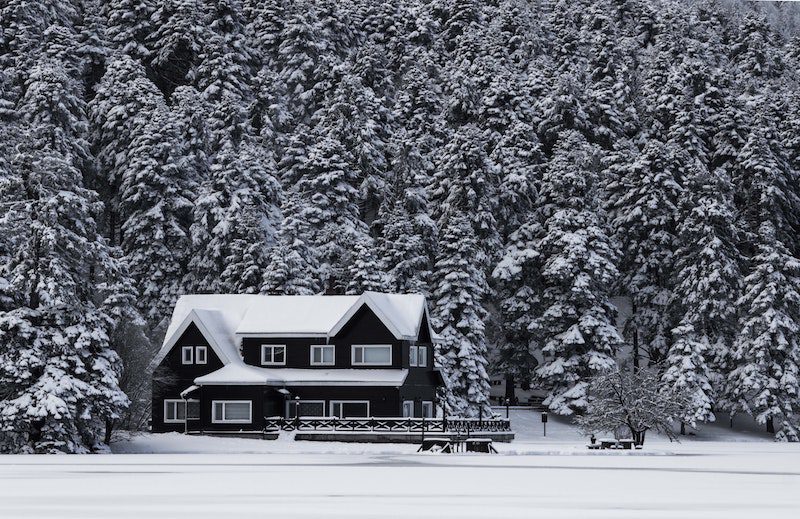
In a landscape cluttered with gas-powered snow blowers that often bring with them a fair share of fuss and environmental concerns, the EGO Power+ Power SNT2405 stands as a shining beacon of innovation and efficiency. Not only does it promise to give its gas-powered counterparts a run for their money, but it also redefines what users can expect from an electric snow blower.
When it comes to clearing snow, we've often been subjected to choices that are loud, messy, and not particularly eco-friendly. The EGO Power+ SNT2405 challenges this paradigm by offering performance that exceeds even gas-powered alternatives. The key to this superior capability lies in its Peak Power technology, utilizing two EGO 56V ARC Lithium batteries to handle the harshest of snow conditions. Simply put, this snow blower doesn’t just clear snow—it owns it.
Where many electric snow blowers fall short is in their inability to manage deeper layers of snow. The EGO Power+ is a standout in this regard with a 24-inch clearing width and a 20-inch intake height. This machine isn't just for light dustings; it's built for winters that don't play nice.
Moreover, this isn't a machine that will call it quits midway through the job. It can clear an 18-car driveway blanketed with 8 inches of snow all on a single charge, thanks to the powerhouse that is the dual 7.5Ah batteries. That’s right, this is an electric snow blower with endurance to boot.
While raw power is crucial, ease of use is equally important. With variable-speed self-propulsion and an additional reverse gear, you can maneuver this machine with a level of control that many other models simply can't offer. The variable auger speed lets you decide the snow throwing distance, effectively allowing you to customize your snow removal experience.
Let's not overlook the LED lights. These four beacons of brightness ensure that you can operate the snow blower at any time, day or night, without compromising on visibility.
Robustness in design rounds out the EGO Power+ offering. Composed of heavy-duty steel and composite materials, this snow blower promises to withstand the trials of many winters to come. It's not just a tool for a season; it’s an investment for several years.
The EGO Power+ Power SNT2405 24 in. Two-Stage 56 V Battery Snow Blower Kit isn't just another entrant in the world of snow blowers. It's a technological leap forward. It effectively balances incredible power and user-friendly features, all backed by a 5-year warranty. It doesn’t just make the task of snow removal easier; it turns it into something approaching a pleasure.
Whether you’re a first-time buyer or considering a switch from a gas-powered model, the EGO Power+ Power SNT2405, available at Louie's Ace, provides a compelling case for why electric is the future of snow removal.
Disclaimer: Before committing to any purchase, it's advisable to personally test equipment and ensure its suitability for your specific needs and environmental conditions.
Available now at Louie’s Ace, this model doesn't just promise change; it delivers it. If you've been on the fence about the transition to electric snow blowers, this could very well be the push you need. So why wait? Make your winters not just bearable but downright manageable with the EGO Power+ SNT2405.
As winter wanes and the first signs of spring emerge, it's the perfect time to start thinking about your garden. Late winter offers an ideal opportunity for planting trees and shrubs, setting the stage for a lush landscape. Louie's Ace Home Center is here to guide you through this process with practical tips and expert advice.
Late winter, just before the spring thaw, is a prime time for gardeners to plant. This season is particularly suitable for dormant bare-root plants like roses and fruit trees. They establish roots in cooler temperatures and burst into life as the weather warms. However, it's crucial to be selective with species; evergreens, for instance, may struggle to establish roots in winter's tail end. Prioritize species that thrive in your region's climate for the best results.
Proper soil preparation is key. Ensure your soil is well-aerated and well-drained before planting. While it might be tempting, avoid over-amending the soil. A moderate amount of compost and bone meal can enrich the soil without overwhelming your new plants. When digging the planting hole, keep it no deeper than the root ball and twice as wide. This provides ample space for roots to grow without being constricted.
When planting, gently place the plant in the hole, ensuring the top of the root ball is level with the ground. For compacted soil, loosening it can facilitate better root growth. Be mindful not to plant too deep, as this can stress the plant and hinder its growth. Remember, the initial care you take in planting can dictate the future health of your trees and shrubs.

After planting, regular watering is essential, especially when the soil below the mulch and in the root ball feels dry. Mulching can help retain soil moisture and regulate temperature. However, be cautious not to overwater, as this can lead to root rot and other issues. Consistent care in these early stages will pay off with robust growth in the spring and summer months.
As you plan your late winter planting, remember that a little preparation goes a long way. Visit Louie's Ace Home Center for all your gardening needs, from quality soil and mulch to a wide selection of trees and shrubs suitable for your area. Embrace this season of renewal and transform your garden into a vibrant, flourishing space.
Selecting the perfect holiday gift for DIY enthusiasts is a thoughtful gesture that acknowledges their hobbies and passions. Louie's Ace Hardware offers an array of top-quality tools and gadgets that cater to a variety of interests, from gardening to woodworking to any hardware service. In this expanded guide, you'll find an even broader selection of gift ideas to inspire and delight the handyman or handywoman in your life.
At Louie's Ace Hardware in Fallon, we take pride in being more than just a hardware store; we're a part of the community's fabric. For over 30 years, our store has been a haven for DIY lovers, offering products that range from basic tools to high-end equipment, all backed by our commitment to customer service and quality.
1. Milwaukee M18 FUEL 2724-20 Leaf Blower ($179.00): A powerful tool for efficient yard cleaning.
2. EGO Power+ CS1604 Chainsaw Kit ($329.00): Perfect for the woodworking enthusiast, offering cordless convenience.
3. EGO Power+ HT2411 Hedge Trimmer Kit ($219.00): Ideal for detailed landscaping work.
4. DeWalt 20V MAX DCBL722B Handheld Blower ($159.00): Compact and efficient for quick yard cleanups.
5. Craftsman V20 CMCK279C2 Blower/Trimmer Kit ($99.00): A versatile and affordable combo for yard maintenance.
6. EGO Power+ LB5302 Leaf Blower Kit ($199.00): High-capacity and user-friendly, perfect for larger yards.
7. Milwaukee M18 FUEL 16 in. Battery Chainsaw ($329.00): Reliable for heavy-duty cutting tasks.
8. Blackstone Liquid Propane Outdoor Griddle ($249.99): Ideal for the outdoor cook and entertainer.
9. YETI Tundra 45 Hard Cooler ($325.00): A durable choice for outdoor adventures.
10. Craftsman V20 CMCBL700D1 Handheld Blower Kit ($89.00): Lightweight and powerful, excellent for quick yard tasks.
11. Weber Traveler Portable Grill ($399.00): A portable grill for the BBQ enthusiast who loves to cook on the go.
12. Craftsman 41 Piece Screwdriver Set ($49.99): An essential set for any handyman's toolkit, versatile for various projects.
13. Bosch 12V Max EC Brushless Palm Edge Router ($149.00): Perfect for the detail-oriented woodworker, offering precision and ease of use.
14. Dewalt 20V Max Lithium-Ion Cordless Drill/Driver Kit ($199.00): A must-have for any DIY project, known for its durability and power.
15. Stanley 65-Piece Homeowner's Tool Kit ($79.99): A comprehensive set for general home maintenance and repairs.
From the practicality of a comprehensive tool kit to the joy of an outdoor grilling session, these gifts are selected to enhance the hobbies and interests of your beloved handyman or handywoman. They not only symbolize thoughtfulness but also offer practicality and longevity, making them gifts that keep on giving.
Think about the current interests and needs of your recipient. Whether they enjoy building, fixing, cooking, or gardening, select a gift that aligns with their passions and adds value to their endeavors.
Louie's Ace Hardware is here to help you make the holidays special with gifts that are both meaningful and useful. Explore these options and more at our store, where quality and customer satisfaction are our top priorities.
Visit Louie's Ace Hardware
in Fallon to find the perfect holiday gift. Our knowledgeable staff are eager to assist you in selecting a gift that will be cherished and utilized for years to come. Happy Holidays from our family to yours!
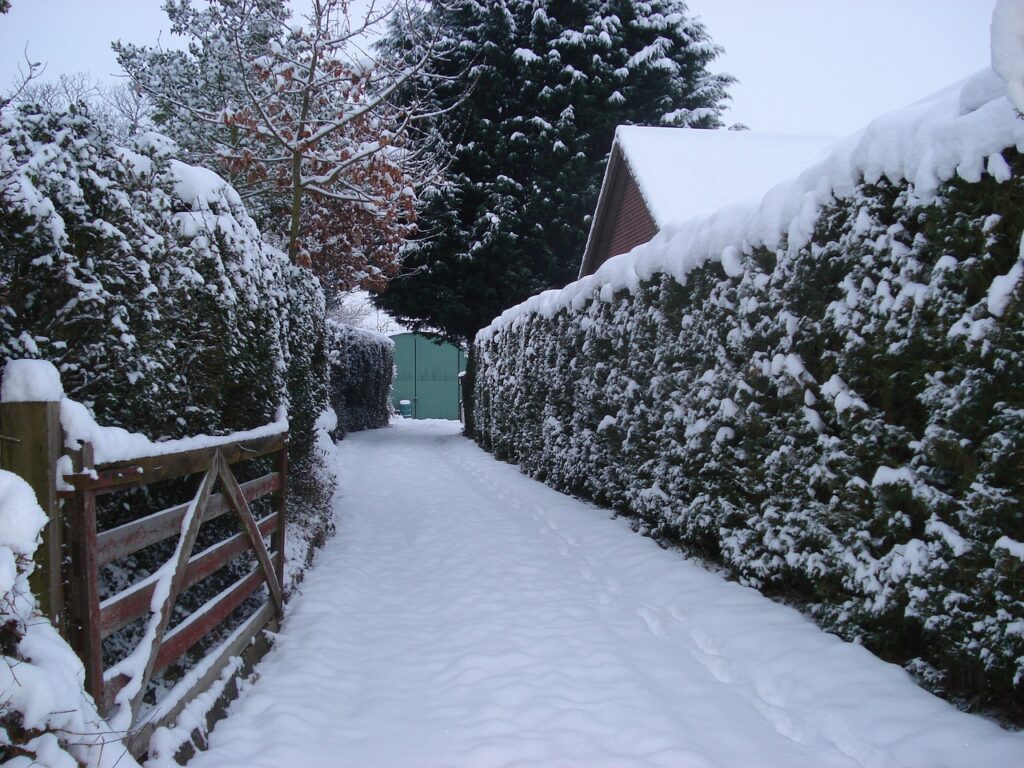
In a landscape cluttered with gas-powered snow blowers that often bring with them a fair share of fuss and environmental concerns, the EGO Power+ Power SNT2405 stands as a shining beacon of innovation and efficiency. Not only does it promise to give its gas-powered counterparts a run for their money, but it also redefines what users can expect from an electric snow blower.
When it comes to clearing snow, we've often been subjected to choices that are loud, messy, and not particularly eco-friendly. The EGO Power+ SNT2405 challenges this paradigm by offering performance that exceeds even gas-powered alternatives. The key to this superior capability lies in its Peak Power technology, utilizing two EGO 56V ARC Lithium batteries to handle the harshest of snow conditions. Simply put, this snow blower doesn’t just clear snow—it owns it.
Where many electric snow blowers fall short is in their inability to manage deeper layers of snow. The EGO Power+ is a standout in this regard with a 24-inch clearing width and a 20-inch intake height. This machine isn't just for light dustings; it's built for winters that don't play nice.
Moreover, this isn't a machine that will call it quits midway through the job. It can clear an 18-car driveway blanketed with 8 inches of snow all on a single charge, thanks to the powerhouse that is the dual 7.5Ah batteries. That’s right, this is an electric snow blower with endurance to boot.
While raw power is crucial, ease of use is equally important. With variable-speed self-propulsion and an additional reverse gear, you can maneuver this machine with a level of control that many other models simply can't offer. The variable auger speed lets you decide the snow throwing distance, effectively allowing you to customize your snow removal experience.
Let's not overlook the LED lights. These four beacons of brightness ensure that you can operate the snow blower at any time, day or night, without compromising on visibility.
Robustness in design rounds out the EGO Power+ offering. Composed of heavy-duty steel and composite materials, this snow blower promises to withstand the trials of many winters to come. It's not just a tool for a season; it’s an investment for several years.
The EGO Power+ Power SNT2405 24 in. Two-Stage 56 V Battery Snow Blower Kit isn't just another entrant in the world of snow blowers. It's a technological leap forward. It effectively balances incredible power and user-friendly features, all backed by a 5-year warranty. It doesn’t just make the task of snow removal easier; it turns it into something approaching a pleasure.
Whether you’re a first-time buyer or considering a switch from a gas-powered model, the EGO Power+ Power SNT2405, available at Louie's Ace, provides a compelling case for why electric is the future of snow removal.
Disclaimer: Before committing to any purchase, it's advisable to personally test equipment and ensure its suitability for your specific needs and environmental conditions.
Available now at Louie’s Ace, this model doesn't just promise change; it delivers it. If you've been on the fence about the transition to electric snow blowers, this could very well be the push you need. So why wait? Make your winters not just bearable but downright manageable with the EGO Power+ SNT2405.
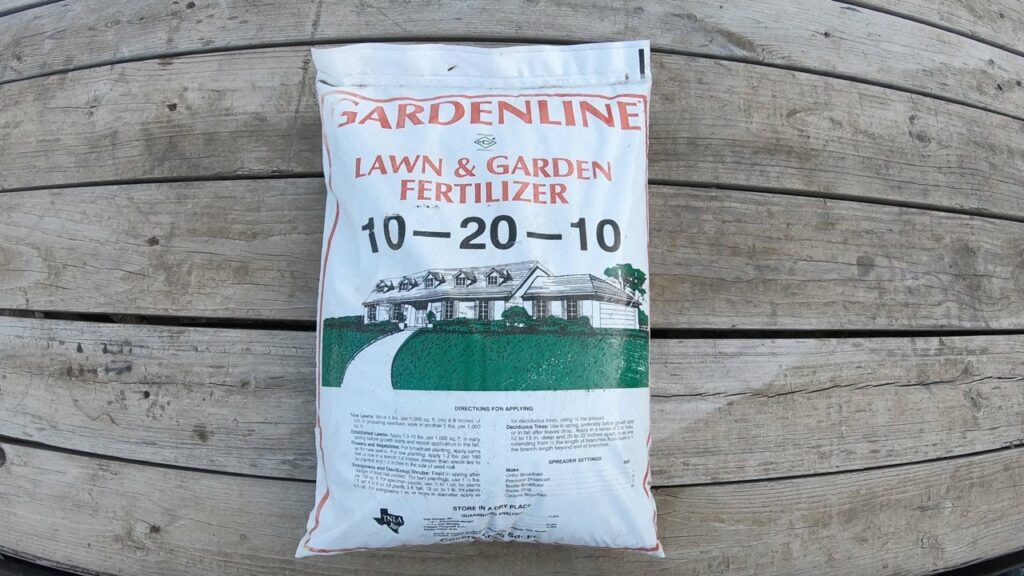
If you’re a newbie to lawn fertilizer, then the numbers listed on the bag may seem like a foreign language when heading down an aisle of gardening supplies. These three numbers are known as fertilizer ratios, and by understanding what each number means, you can improve the appearance and longevity of your lawn.
Fertilizer is great for helping strengthen roots and promote new growth year round. Taking care of your lawn is important because the grasses commonly used can purify air and improve overall air quality, in addition to the fact that a nicely manicured lawn is aesthetically pleasing. Grasses are great at absorbing rainfall, preventing erosion, and purifies water for aquifers in the area.
Each of the three numbers listed on the front of the bag of fertilizer represents nitrogen, phosphorus, and potassium. Together they are known as NPK ratios, and are indicated using their element symbols that you may remember from chemistry class. All three are essential elements in gardening products for growing a beautiful lawn.
Each one serves a different purpose in ensuring your grass grows green.
NPK ratios apply to all types of fertilizer, but there are certain specifications to follow for lawns and all of the different conditions the lawn may be in.

Our gardening experts suggest fertilizer should be put on your lawn two to four times a year. Resistance from pests, protection for the soil, and preventing pesky weeds are just some of the perks when taking care of your lawn with fertilizer from ACE Hardware. The fertilization process is cost-effective, simple, and environmentally friendly. Because of how low-maintenance lawn care can be, you can spend more time doing plenty of other fun outdoor activities this summer!
Here’s some of our ACE Hardware team’s top fertilizer recommendations:
https://www.acehardware.com/departments/lawn-and-garden/lawn-care/lawn-fertilizers/7232325
This fertilizer is one of our best selling options because it stops crabgrass at its roots and is safe for use on Bermuda grass. It’s a great fertilizer to use in post-winter lawn care routines, and is a trusted formula no matter what climate you live in.
https://www.acehardware.com/departments/lawn-and-garden/lawn-care/lawn-fertilizers/70555
Milorganite is produced from the nation’s oldest and largest recycling efforts. It’s fortified with iron for a longer lasting green. The slow-release formula can be used on trees, shrubs, or flowers as well.
https://www.acehardware.com/departments/lawn-and-garden/lawn-care/lawn-fertilizers/7002870
A quick greening, long lasting lawn is possible with Pennington and its premium blended fertilizer. With fast acting nitrogen for quick greening in addition to slow release nitrogen at 10.5% for extended feeding up to three months, the blend of fertilizer includes a boost of 5% iron.
At ACE Hardware, you can be assured that our hardware and garden supplies are top notch and in stock. With plenty of fertilizer choices for every budget, lawn, and gardening style, you can’t go wrong with keeping your lawn healthy and happy.
Be sure to visit Louie’s ACE Home Center for all your lawn care questions and gardening supplies!
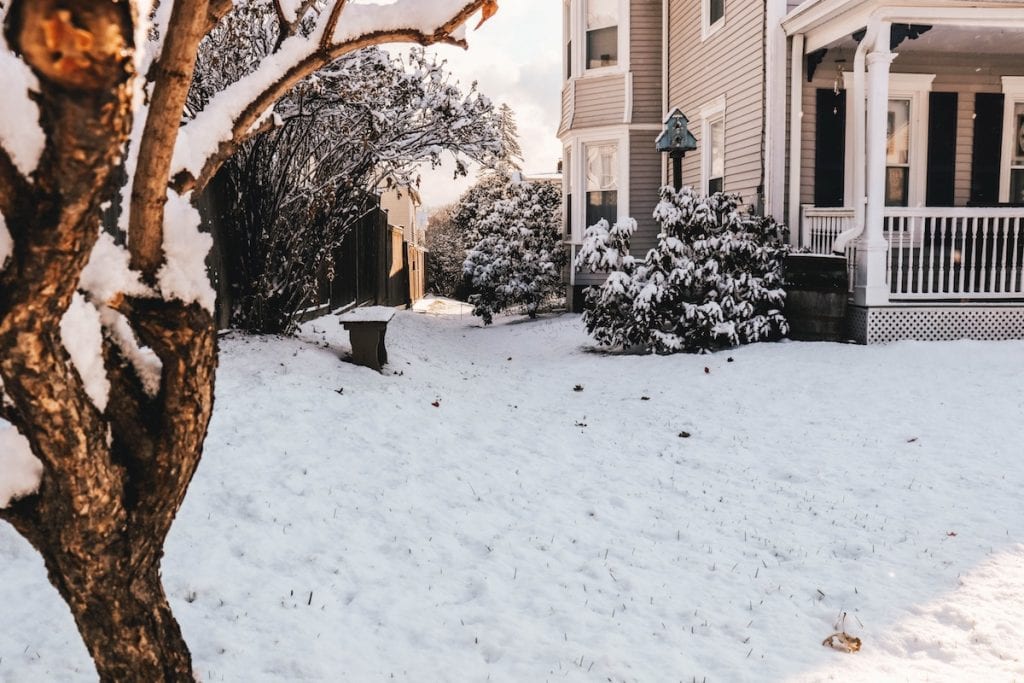
As we are all preparing for the cold by putting away our summer clothes and pulling out our winter clothes, we also need to start preparing our homes for the changing weather. Before it gets too cold, it’s a good idea to do some seasonal maintenance on your home. Performing a few simple maintenance tasks can save you from costly repairs later on. Here is a simple fall home maintenance checklist to get your home ready for winter:
Nobody wants a leaky roof when the rain comes. At the very least, make sure to do a visual inspection of your roof from the ground. Look for missing, loose, or damaged shingles and be sure to replace or repair them. If you can, get a better look at the roof by climbing up there and inspect every shingle. Also, if you have a flat roof, remove any debris to prevent blockage of drains and other damage. You should also check your chimney and fireplace to ensure that they are ready to be used. It is best to hire a professional to inspect and clean your chimney.
It is very important to clean out the gutters before it starts raining. You can hire a company to do this or do it yourself. Either way, leaves, nests, and any debris needs to be removed. In addition, you should check for leaks in the gutters and repair them.
Preparing your irrigation system early can save you from disaster later. You should drain and check the system prior to the cold season. If you live in a place that gets snow, be sure to mark your sprinkler heads so snow removal equipment doesn’t run them over. It is also wise to bring any hoses inside so they are protected from the cold.
There are many precautionary steps you can take to protect your landscaping from the winter. First, inspect your trees to ensure that they are healthy for the cold weather. You don’t want any tree limbs to fall on your home, car, or power lines. Also, trim back any bushes, shrubs, and flowers as recommended in your climate zone. If you have any plants in flower pots, bring them inside to protect them. It is also very important to fertilize your lawn to prevent damage from the cold and weeds in the spring.
If you have any lawn chairs or other seasonal furniture, it is best to bring those things inside your garage or shed. Remove the cushions and wash them, so they are ready to go. And wipe down the furniture and store it in a dry place.
Looking for drafts in your home can help you stay warm and save energy this cold season. Check all of your doors and windows by feeling for drafts. If you feel any air coming in, you may need to replace the seals or repair caulking. A great way to check for drafts is to hold a lighted candle near the crack and if the flame flickers, there is probably a draft.
No matter what kind of air conditioning system you have, you should prepare it for winter. If you have an outdoor unit, it is best to cover it. Covering the unit protects it from the cold and prevents any water from entering the unit. If you have a window unit, bring it inside so that you can close the window for the fall and winter.

Prior to firing up your heating system, perform an inspection or hire a professional to do so. Test for leaks, check the heating efficiency and replace the filters. In addition, it is a good idea to check out all of the vents in your home. Make sure all of the vents aren’t blocked by anything and are free of dust.
Be sure to perform an inspection of all of your home safety devices. Replace the batteries in all of the smoke detectors and carbon monoxide monitors and make sure they are working properly. If you do not already have a carbon monoxide device, I would recommend getting one for your home.
Here at Louie’s ACE Home Center, we know how to complete your fall home maintenance checklist. Come on by to pick up anything you may need to get your home ready or to ask any questions you may have. Did you know about our Fallon, NV Hardware Store? This is where you can rent quality tools, parts, and other hardware for short term use, and purchase the tools and hardware you need from quality national brands you know and trust. While hardware is our speciality, we also offer party rentals and key duplication services! We also offer a variety of hardware services and support to help you with your next home improvement project.
We are happy to help and here to serve you, so contact us today and get that fall home maintenance checklist done!
Winter has come, but it's never too late to pick up the essentials. Louie's ACE Home Center has all of the tools, heaters, and more to get you through the season. Check out our list to see if you have all of the necessary winter essentials for home!
Living in Reno, Nevada, you're never really sure what the winter will bring. For the days where the temperature is below freezing and dumping snow, our vent-free stoves are the perfect addition to your home. They are easy to install and bring all of the beauty and warmth of a fireplace to your home without the maintenance.
For the warmer winter days (aka anything over 45 degrees), our outdoor fire pits are a must-have! You and your friends can gather around the fire pit, roast marshmallows, and enjoy the "warm" winter's night.
Snow shovels are the go-to winter essentials for home during those winter storms. There are three types of snow shovels, and each of them has a specific function.
Plastic Shovels: Plastic snow shovels are an excellent choice if you are looking for something that is easy to use and lightweight. A common misconception about plastic snow shovels is that they're flimsy, but in actuality, they are able to hold and dispose of snow better than a metal snow shovel. Because plastic shovels can become worn down over time (depending on how much it snows in your area), it is recommended that you don't use this shovel to scrape ice.
Steel Shovels: If you are looking for a shovel that will last you through several winters, a steel snow shovel is the way to go. They are optimal for scraping both the ice and snow from your driveway and pathway. However, because they are made of steel, these shovels are heavier and require more energy to operate than a plastic or aluminum shovel.
Aluminum Shovels: Aluminum snow shovels are a happy medium between plastic and steel shovels. While they are more durable than plastic shovels and much lighter than steel shovels, they tend to bend easily. When you are shoveling your driveway or scraping away at the ice, make sure that you aren't putting in too much force to prevent bending your shovel.
With the temperatures dropping lower and lower, it is time to think about purchasing a standby or a portable generator for your home. Here are a few reasons why a generator should be a winter essential for your home:
Backup Heater: Nothing is worse than your thermostat deciding to bite the bullet just as the cold weather begins to set in. In this situation, you have the ability to call your local repair service and have them send someone over to fix it. But when you are left without power, a huge concern is how you're going to keep your family and yourself warm. These are the times when owning a backup generator comes in handy.
Keep Appliances Running: In the event of a power outage, you want to ensure that all of your appliances, primarily your refrigerator, keep running. Purchasing a generator will not only supply power to your home appliances, but also supply power to your home security system, computers, cell phones, and more.
Winter is in full swing here in Nevada, and we at Louie's ACE Home Center want to make sure that the residents of Reno are fully prepared for the chilly season. Come on in and grab your winter home essentials!
While it’s too cold to actually start gardening in winter, this is the perfect time to start planning for your spring garden. And of course you could simply buy seeds, soil, and other gardening supplies right before you decide it’s time to plant. However, planning for your spring garden in the winter will help you create the best garden you’ve ever had. You’ll be better prepared, better equipped, and more confident in your gardening abilities. So, check out some of these helpful tips for planning your spring garden in the middle of winter.

To get the most beautiful garden, you should start preparing yourself and your yard during the winter months. Start by assessing the weather you’ve had this past winter. Was it colder than normal? Did it snow more than it typically does in your area? Is it more mild than usual? All of these things may affect the longevity of your plants life and should be dealt with before you start gardening. If it’s especially cold this winter, you’ll need to take extra precautions to protect your plants from freezing temperatures.
Also be sure to assess the area you intend to plant your garden. Look for any damage to your yard that may need to be fixed before you start digging your gardening supplies into the ground.
Gathering all of your materials, such as seed catalogs and gardening supplies, will help get you excited about your future garden. Since it’s still too cold out to begin planting right away, having the tools you need before hand are a good way to start the process. Also keep in mind that seed catalogs provide a great advantage to gardeners. Using seed catalogs to find the plants you’ll use in your garden will usually ensure that you’re getting high-quality seeds. And don’t forget to stop by Louie’s ACE Home Center for all of your gardening tools! We have a great selection to choose from and our friendly staff is always happy to help our customers find the right tools for their projects.
 Consider Using Cold Frames
Cold frames are very popular in areas, such as Reno, that experience severe cold weather. They’re transparent-roofed enclosures that are built low to the ground and help protect plants from excessive cold or wet weather. The transparent roof allows sunlight to enter while also effectively trapping in heat. The roofs can be taken on and off and are perfect for controlling temperatures and climate that your plant will have to endure. Essentially cold frames help the gardener extend their growing season.
A seed germination test will help you determine if the seeds you’re using for your garden will produce thriving, beautiful flowers and plants or not. To do this, start by taking a few seeds from the package and planting them in small pots. Next, place those pots in conditions that will most likely make your seeds germinate. Lastly, watch them as they grow to determine whether or not they grow healthy sprouts.
After all of the prep-work you’ve completed, you’re finally ready to start planning your garden and picking out your plants! This is easily the most fun part of the preparation process and will help to bring your garden to life - literally. Be sure to check the grow zone of the area you live in. This will help you determine which plants will do better in the type of living condition they’ll be in. This tool will help your garden thrive, and prevents you from having to buy more seeds and other gardening materials later on.
At Louie’s Home Center, we have a wide variety of gardening supplies available. From soil and fertilizer, to shovels and rakes, we have just about everything you need to get the garden of your dreams. Our knowledgeable staff is always willing to guide you in the right direction when you come into visit. Connect with us today!
The Reno Tahoe area has had one of the most extreme winters that we have had in years. With a flurry of winter storms, it has become even more important to build a winter emergency car kit. If you end up stuck in a storm, slid off the road, or in an accident, you may end up stranded in severe temperatures. In these situations, it’s important to prepare beforehand with the proper winter emergency car kit.
At Louie’s Ace Hardware, we carry all the essentials that you need to create an emergency kit for your car. Here’s the items we recommend carrying for winter safety in case you get stuck in a blizzard.
This is the basic kit that we recommend having in your car year-round. These essentials also serve in cold weather too. If you need to replenish your safety kit, it’s a good idea to do this before heading out into any kind of severe weather.
In addition to your basics, we also recommend having a cold weather bag, specifically stocked with emergency items needed in a blizzard. Here’s some items that you should keep in your vehicle this winter:
In the case of an emergency, you may not be able to access all areas of your car. Keeping your glove box stocked with safety items can give you quicker access to a few basics.
In case you must exit your car or walk to get help, it’s important to have proper winter clothing and layers that can keep you warm in freezing temperatures.
We hope this check-list helps you prepare for winter storms. Stop by Louie’s for all your winterizing needs. We’d love to help you put together your next emergency kit and choose the right items for your vehicle.
 Are you ready to start planning for your spring and summer camping trips? A few months ago we showed you how to winterize your RV to get ready for the colder months. Now, we'd like to share our best tips for de-winterizing your RV, so that you can be on the way for your next adventure.
Before you go out for a trip, make sure you check your RV for gaps, cracks, and tears. You’ll want to fix these before the season starts to ensure a safe and enjoyable experience.